In React, the way events are handled differs slightly from how they are handled in HTML.
1. How to Use Events
- In HTML, when defining events, all event names are written in lowercase. In React, events are defined using
camelCase.
DOM events provided by React (refer to the "Event Names" section) - https://reactjs.org/docs/events.html#clipboard-events
As shown in the example below, if you write the onclick event like in Button1, you will notice that the event does not trigger properly in React. React uses JSX, so using the HTML method for event handling won't work. JSX is similar to HTML and easy to use, but there are some differences, so learning JSX is important when working with React.
JSX reference - https://reactjs-kr.firebaseapp.com/docs/introducing-jsx.html
The second button (Button2) uses the correct camelCase syntax for JSX. When clicked, you will see the event trigger properly.
   ...
   <button onclick={this.handleEvent}>Button1</button>
   <button onClick={this.handleEvent}>Button2</button>
   ...
2. Preventing Default Event Behavior
- In HTML, you can prevent the default behavior of an event by returning
false. In React, you usepreventDefaultto stop the default action.
Below is an example demonstrating how to prevent the default action when executing the handleClick event. The first example shows how this is done in HTML, while the second example shows how to handle it in React.
...
<a href="#" handleClick="alert('clicked'); return false">
  Click me
</a>
...
...
    handleClick(e) {
        e.preventDefault();
        alert('clicked');
    }
...
3. Event Binding
One of the most important aspects of events is binding. Binding is essential because if you don't explicitly bind a method, the this keyword inside that method will refer to the global window object, not the React component class.
In the example below, the test1 button does not bind this, so when console.log(this) is called, it will print undefined.
In test2, the arrow function binds this, and you will see the correct this object for the class.
render() {
    return (
      // 1. test1 - undefined
      // 2. test2 - event log
      <div>
        <button onClick={ function() {console.log(this)}}>test1</button>
        <br />
        <button onClick={() => console.log(this)}>test2</button>
      </div>
    );
}
React provides 4 ways to bind events.
Here are the example codes assuming there is a handleClick function:
- Binding in the constructor
    ...
    class Example extends React.Component {
        constructor() {
            super();
            this.handleClick.bind(this);
        }
    }
    ...
- Binding in the
rendermethod
    ...
    class Example extends React.Component {
        ...
        render() {
            return(
                <button onClick={this.handleClick.bind(this)} />
            )
        }
    }
- Using ES6 arrow functions
- Declare the method as an arrow function
    class Example extends React.Component {
        ...
        handleClick = () => {
            ...
        }
       ...
    }
- Bind in the
renderfunction
    ...
    class Example extends React.Component {
        ...
        render() {
            return (
                <button onClick={() => this.handleClick} />
            )
        }
    }
- Using the
autobind-decoratorlibrary
    import autobind from 'autobind-decorator';

    class Example extends React.Component {
        @autobind
        handleClick() {
            ...
        }
        ...
    }
Cases where you don't need to bind events:
- If you don't need to use
thisto refer to the class instance - When using
React.createClass() - When using arrow functions
- If you call the same method multiple times, you can bind it in the constructor once to avoid redundant bindings
Up until now, we've discussed the differences in event handling between HTML and React, as well as event binding in React. Now, let's go through a practical example of a React component for a Vending Machine.
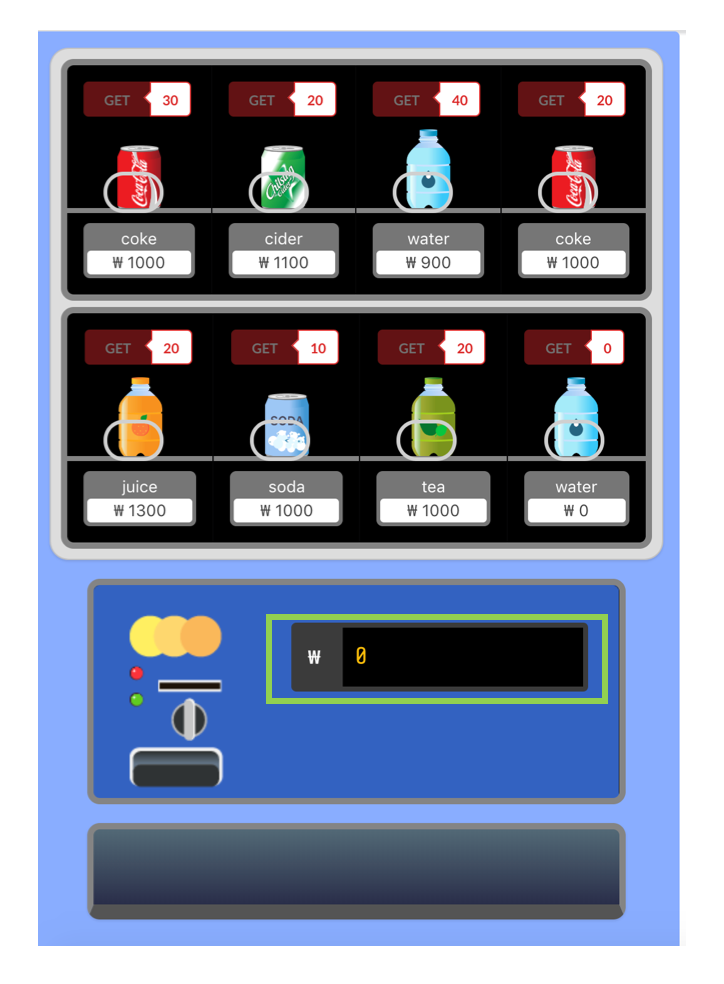
The first event we will explain is the price input event.

When the price is entered into the green section, it is stored in the price state of the VendingMachine.js file. In this example, the setPrice method is used in the VendingMachine file, which is then passed down to the InputPanel component as a prop. The price is passed as a prop so that the price of the selected drink can be subtracted accordingly.
    class VendingMachine extends React.Component {
        ...
        this.state = {
            price: null
            ...
        }
        ...
        setPrice = (amount) => {
            this.setState({ price: amount });
        }
        ...
        return (
        ...
        <InputPanel setPrice={this.setPrice} price={this.state.price} getDrink={this.getDrink}/>
        ...
Below is an example showing how the InputPanel.js file receives the function and state values passed from the parent component (VendingMachine.js) through props. If you declare the values as const inside the render function, you can omit the this.props reference. Otherwise, you would need to prepend this.props every time you use a prop.
The input box event (onChange) triggers when a value is entered, passing the value to the setPrice function, which updates the state of the price in the VendingMachine component.
    class InputPanel extends React.Component {
        ...
        render() {
            const { setPrice, price, getDrink } = this.props;
            return (
                ...
            <input onChange={(e) => setPrice(e.target.value)} value={price} />
                ...
If you want to check whether the price is correctly passed, you can log it in the parent component (VendingMachine.js)'s render method by using console.log('price: ', this.state.price);. This will allow you to verify if the value is being saved correctly as you enter a price.
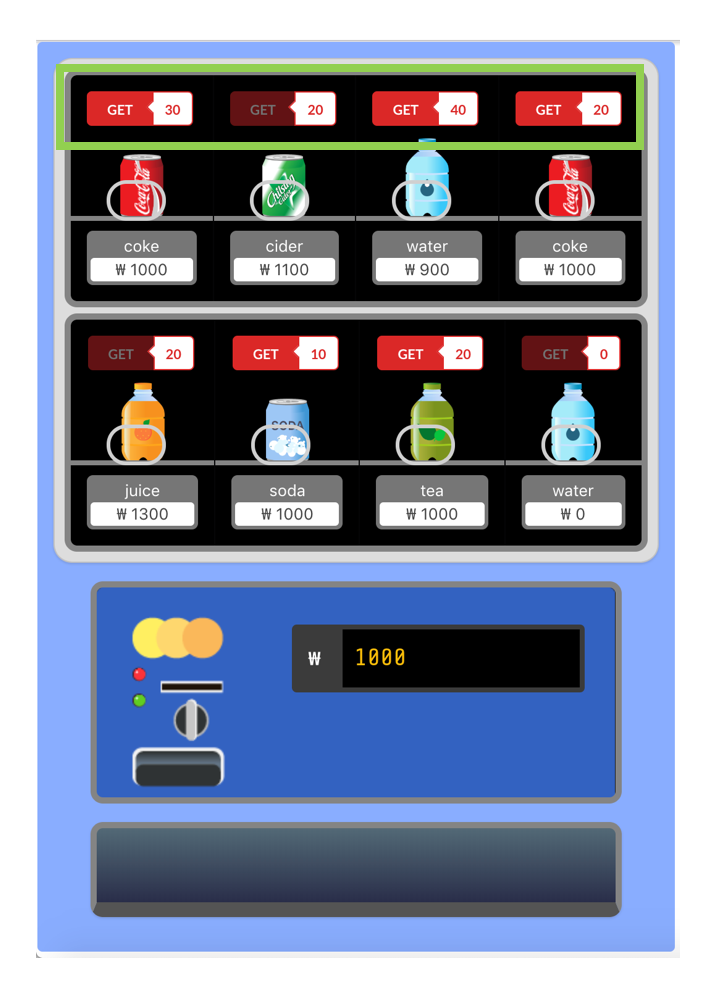
The second event we will explain is the event that compares the entered price with the price of drinks and activates the button only for drinks that are affordable.

After the first event triggers, the price changes, and the entered price is passed as a prop to the Drink.js component. The VendingMachine.js passes the buttonClick event handler and the price of the drink via props like this:
<Drink buttonClick={this.buttonClick} price={this.state.price} item={items[i++]} index={i} />
Initially, all drink buttons are disabled. However, after entering the price, only buttons for drinks with a price less than or equal to the entered price become enabled. This is because the price is passed as a prop, and the button only becomes active if the drink's price is less than or equal to the entered amount, and the quantity is greater than zero.
JSX syntax requires the use of {} when including JavaScript expressions. The comparison of prices is done using the ternary operator (? :), which is a shorthand for if-else logic.
Ternary operator reference - https://developer.mozilla.org/en-US/docs/Web/JavaScript/Reference/Operators/Conditional_Operator
In this example, the button is activated if the entered price is greater than or equal to the price of a drink, and if the drink's price is not zero and its quantity is not zero. Otherwise, the button remains disabled in all other cases.
class Drink extends React.Component {
    render() {
    const { item, buttonClick, price, index } = this.props;
    return (
        ...
        {price >= item.price && item.price !== 0 && item.quantity !== 0 ?
        <Button onClick={() => buttonClick(index, item)} size='mini' color='red'>GET</Button> :
        <Button size='mini' color='red' disabled>GET</Button>
        }
        ...
In Drink.js, the buttonClick function is passed the information of the selected drink (such as drink name, price, quantity) and its index as parameters, and you can see that the VendingMachine.js updates the new price and the item quantity using setState.
The following code shows the buttonClick function declared in VendingMachine.js. Inside the function, the price is reduced by the drink price, and the result is stored in a new variable newPrice to simplify later updates within setState.
Since the state contains multiple items (not just one), we use map to loop through all the item information in items. The index of each item is passed as a parameter along with the item details, and by comparing the index passed to the buttonClick function with the index in the state, we update the quantity of the selected item by reducing it by 1 and then store the updated state.
...
buttonClick = (i, item) => {
    const newPrice = this.state.price - item.price;

    this.setState({
        items: this.state.items.map((item, index) => {
            if (i - 1 === index && item.quantity > 0) {
                return { ...item, quantity: --item.quantity };
            }
            return item;
        }),
        buttonClicked: true,
        price: newPrice
    });
}


...
Thank you.


